Monday, June 13, 2011
Editing Lightroom to Photoshop as a Smart Object
Do you like this story?
If you work in Lightroom, at some stage you’ll probably want to take an image to Photoshop editing for some additional processing. How you send it to Photoshop will have an impact on the options available to you. One option in Lightroom is to take an image to Photoshop as a Smart Object and that has some advantages. Here’s how to do it and why you might consider using this feature.
Open as a Smart Object
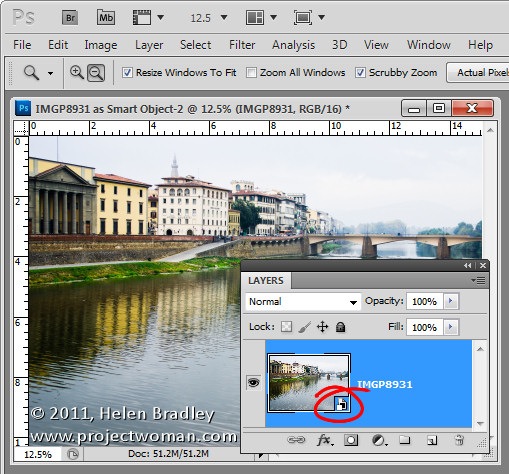
In Lightroom, when you’ve finished processing the image and you’re ready to head to Photoshop, right click the image and choose Edit in > Open as Smart Object in Photoshop (this is available if you’re using Photoshop CS5, CS4 or CS3 – Smart Objects weren’t available in earlier versions of Photoshop).If you want to make further adjustments to the image you don’t have to start over. Instead, double click the image thumbnail in the Layers palette and the image will open in Adobe Camera RAW (ACR). The processing options in ACR are the same as you have in Lightroom so you can change how the image is processed.
When you are done making changes, click Ok. The changes to the image will appear in the Smart Object back in Photoshop.
Double click on the thumbnail of this second Smart Object to open it in ACR and now process it a second time to bring out detail in another part of the image. In this case I adjusted to get a better sky. When you’re done click Ok to return to Photoshop.
The changes have been applied to only the second copy of the image and not the first so there is a different version of the image in each layer.
To blend the two layers together add a Layer Mask to the topmost layer – to do this, select the layer and click the Add Layer Mask icon at the foot of the Layers palette. Target the mask by clicking its thumbnail in the Layers palette and paint on the image with black to bring back detail in the layer below.
If any of the layers still needs fine tuning, return it to ACR to fix it.
Because the two versions of the image are on separate layers you can blend those two layers together using a blend mode or adjust the Opacity of the top layer.
If any of the layers still needs fine tuning, return it to ACR to fix it.
Because the two versions of the image are on separate layers you can blend those two layers together using a blend mode or adjust the Opacity of the top layer.
If you want to edit this image again at a later date and have the Smart Objects still in place, when you right click the image and choose Edit In > Adobe Photoshop CS5 (or CS4 or CS3), choose Edit Original.
Taking your images to Photoshop as Smart Objects gives you additional tools for working with your images in Photoshop – it’s a handy technique to add to your Lightroom to Photoshop Editing toolkit.
Subscribe to:
Post Comments (Atom)


0 Responses to “Editing Lightroom to Photoshop as a Smart Object”
Post a Comment