Wednesday, August 3, 2011
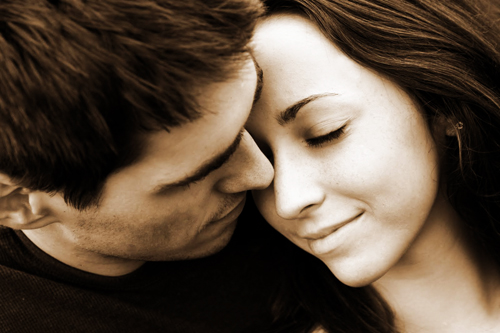
The importance of wedding photography is emphasized by the fact that most weddings seem to pass by very quickly for brides and grooms. If you ask most married couples to describe their special day, they will tell you it went by in a blink of an eye. This is the main reason wedding photography is so immensely important; it captures in sharp focus the moments of a day that requires months of planning and then so often passes by as blur for the bride and groom.
BUILDING A RELATIONSHIP
The most important part of wedding photography is the relationship you build with your clients. That relationship begins with the first meeting and continues to grow with each step of the wedding planning through the presentation of final photographs. In fact, great wedding photographers continue the relationship with past clients long after the couple has received their final product. You might be the best photographer and technically brilliant, but to be a great wedding photographer also requires the right kind of personality. You need to sincerely want to be friends with your clients and fully gain their trust.
As a wedding photographer, a bride and groom will be sharing one of the most intimate days in their lives with you. You will be there as they are getting ready, when they see each other for the first time that day, when the bride walks down the aisle toward her future husband and when, as a couple, they walk back down the aisle after the ceremony. You’ll be there when the couple is introduced as a married couple for the first time, when they have their first dance, and all the other noteworthy moments during the wedding day.
To best capture all of these intimate moments, you must develop a strong and trusting relationship with both the bride and groom. When you meet new clients, try to begin to build this relationship from the very first time you speak with them, by focusing the meeting on their needs, not yours.
INITIAL MEETING
When meeting by phone or email, it is really important to clearly convey your thoughts and information. Unfortunately, it’s entirely too easy to have miscommunications and misunderstandings when only communicating by phone and email. To counteract this, always try to be really specific and when in doubt, make sure to ask questions and get clarifications.
When you do get to meet potential clients for the first time in person, let them pick the location. Many people want to meet at a coffee shop and that can be a good choice, but try to suggest one that isn’t very busy so that you can talk with little interruption. Other great locations are nice hotel lobbies or even a quiet restaurant. There will be times you’ll be invited to the client’s house, which is great because it lets you get a strong sense of who they are and assess their personal style. Meeting at a client’s home also allows you to meet them where they are most comfortable and it will help you understand what direction they may be leaning in regards to their budget and style of photography. You can also learn more about their personalities and interests.
At this initial meeting, bring a couple of wedding albums so prospective clients can see more detailed examples of your work. It is important to let them see samples that cover the entire wedding day. For most couples, choosing a wedding photographer is a new experience. Often, they don’t realize the depth of services you can provide, so this is a great opportunity to show them how you can fully capture their special day. Also bring along a pricing sheet so you don’t have to discuss or barter about price and service. Don’t ask for a deposit or expect the couple to make a decision immediately. In fact, don’t discuss pricing unless the couple brings it up. Just leave them with the pricing guide so they can take the information home and discuss it.
Choosing a wedding photographer is an important decision to make and there is no need to rush it or be pressured into making a decision. Make sure potential clients have enough information about what you do and how you do it so they can make an informed decision. Tell them to go home, discuss the meeting, look over your images, and contact you with any additional questions they might have. If they hire you, make them feel confident that they chose the best photographer for their special day.
The initial meeting is not just about a business negotiation, but it is a chance to get to know the couple, to see how they interact and to find out about their wedding day. Regardless of whether you are meeting the clients in person, on the phone or through email, try to get as much information about the wedding and the couple as possible. For example, the choice of wedding location and reception are usually significant choices for the couple. Perhaps they picked the historic church because they love the architecture or the museum reception location because they are lovers of art. Knowing these elements would be beneficial for you to know as the photographer and possibly incorporate in the shots.
An important aspect of this initial meeting is that it gives you a chance to educate potential clients about how you work and what they can expect from you. While price and their budget can come into play, most people will book you because of your personality, your work, and the experience you bring to the table. The impression you make at the initial meeting will help potential clients determine if you will be a good fit for their wedding.
Questions to ask the couple at the initial meeting:
* Bride’s name and contact information
* Groom’s name and contact information
* Where will the wedding be held?
* Where will the reception be held?
* What is the wedding date?
* What is the wedding schedule?
* Will there be a rehearsal the night before?
* Is there a wedding coordinator? If so, need contact information.
* Why did they choose the locations and date?
* What are they looking for in a wedding photographer?
* Find out more about their families
* How do they want to handle their first meeting—before the wedding or when the bride fi rst walks down the aisle? This will determine the wedding schedule.
* How did he or she propose?
* What is the location of the honeymoon
* Estimated number of guests at the wedding
* Names of all the people involved in the wedding (family, wedding party, main relatives, helpers)
* List of all the vendors (which you can use when you credit them in your blog and also for sending your work for publication)
* Learn more about bride’s and groom’s backgrounds, including how they met, what they do, and their hobbies and interests
Initial Meeting Checklist:
* Meet in person when possible
* Let the client choose the location
* Dress appropriately for the occasion
* Pay for your clients’ coffee or drinks
* Take sample photo albums
* Take a calendar updated with all previous obligations
* Provide a price list for the client to take home
* Discuss expectations, both yours and the clients’
* Take a laptop or notebook for notes
* Don’t expect or require the couple to make an immediate decision
BEING ON THE SAME PAGE
While it isn’t usually great business practice to turn down clients, it is important to recognize when a couple may not be a good fit for your business. While there’s an innate desire to want to book every wedding, it is not usually possible from a scheduling standpoint, and certainly not desirable. You have to select wisely, ensuring that you and the client will both be happy in the end. Chances are, if you are booking every wedding, you’re not being selective enough. The case may also be that you are not pricing yourself appropriately.
CONTRACT NEGOTIATIONS
Often the biggest hurdle in finalizing a deal is price. Weddings are expensive, and there are lots of unexpected costs that couples won’t anticipate. But after the food has all been eaten, the thank you notes written, the dress hung up and their life as a married couple well on the way, the photographs from the wedding will still be there to transport them back to that day, that time. Even if the couple doesn’t understand how important their wedding photos will be, you must know how much your work is worth.
Negotiating is fine, but too often wedding photographers (photographers in general really) are tempted to lower our prices just to get the job. As photographers, we need to value the time and the investment we have made in our businesses, and when you negotiate lower prices, you are potentially losing profit in your business. If you respect yourself and your talents, clients will too. Remember that even if you do not get this client, there will be another opportunity waiting for you.
It is important to make sure your clients understand what they will be getting in return for their money, and help them see the value in what you will provide. When a couple wants to hire you, send them a contract, which details the services you will provide so there are no surprises later on. Include an advance fee due to reserve the date and lock you in as their photographer. Do not use the term “deposit” because legally a deposit can be refunded. Make sure they are clear that this fee is non-refundable because you are setting this date aside for them alone, and cannot take on any other jobs that day. It is not acceptable for them to cancel when you may have turned down other potential clients.
Some of the important information in a contract includes:
* Client contact information
* Venue location
* Event date
* The amount of time you will be shooting on their wedding day
* Engagement photos
* Assistant costs
* Second shooter costs
* Incidentals and travel costs
* Album costs
* Prints
* Fee schedule, including amount due for “date-reservation”
* When the clients can expect to receive their final images
* What happens if you cannot make it due to an act of God, accident or other legal issues?
* What happens if they are forced to cancel or reschedule their wedding?
SUMMARY
As you begin your relationship with new clients, it is important to gain their trust and remember that while you may shoot dozens of weddings each year, this is most likely a once in a lifetime experience for them. Imagine the positive impact you can have on the couples you photograph. Let them know you understand the significance of this event and want to be part of their special day. They will appreciate you for rest of their lives.
Wednesday, August 3, 2011 0

Shrouded by the plethora of ceremonies and rituals that mark an Indian Wedding, the work of a Wedding photographer becomes much more challenging and unpredictable. The diversity in customs and conventions from one wedding to another paves way for a need to get acquainted with commonalities of Indian Weddings, so as to not miss the crucial events.
How different is an Indian Wedding? Well, completely different if it is not a Church wedding. (Even in the case of a church wedding in India, as a photographer you can be stumped.) A Hindu wedding can run into a couple of days or can also be condensed into a couple of hours.
Here's a few suggestions to keep in mind while planning to shoot an Indian wedding:
1. Meet the Couple
Might sound silly, but in most occasions at Indian weddings you could end up meeting the couple for the first time on the day of the wedding. A quick rendezvous earlier will help set the expectations, plan shots with the couple & get them in the comfort zone to be clicked by you. This would make it easy on the D-day & you will be sure not to miss that imperative moment!
2. Planned Shots Vs Candid
It is extremely difficult to get exclusive time with the couple during the wedding for pictures and hence you would have to get most of your shots as the event is happening. If planned properly, you could get a window of 20-30 minutes with the couple for your planned shots. Make good use of it! Ensure to schedule the planned shots before the wedding begins or a day before the wedding. After the rigors of the Indian wedding, the couple won’t be greatly amused to pose for you
3. Photography Co-ordinator
Well before the wedding, ask the couple to nominate a family member who would help you. Even in the “small” Indian wedding, you can end up with hundreds of “close” family thronging to be in proximity to the couple, hence creating a framing catastrophe. You definitely would need the photo co-ordinator to introduce you to the close family members who ought to be covered in the photographs and also help in getting you to the Bride and Groom on the day of the wedding. A co-ordinator would come extremely handy in handling crowd while you are busy taking pictures.
4. Know your Wedding Process
As mentioned earlier, each Indian wedding is unique in its own way. Speak to the couple and the family well in advance and understand the wedding, the events, and their importance. In Indian weddings, the photographer is expected to capture certain specific moments of the event. If caught unaware, you might end up missing key moments.
5. Second Photographer?
The bride and groom in Indian weddings have their own set of events even before they arrive at the wedding venue. At times, these events could clash and the photographer surely cannot be omnipresent. Irrespective it helps to have a second photographer else you could miss out on some events or you would have a good cardio session running between places with the entire camera gear.
6. Family Photo?
Ironically, you have to be careful with “Family” pictures in Indian weddings. Every one amongst the hundreds that make it to the wedding consider themselves close to the couple and would expect a standard flat “happy” picture with the couple. Plan well ahead with the couple on family group pictures and make use of a family member to help you here. Else, you would end up shooting Gbs of photographs. Also, it may be advisable to suggest a regular photographer to those who may find it a must, while you remain exclusive for the ‘special moments’.
7. Lights!
As a part of scouting the venue, check on the lights that are going to be used to illuminate the stage. In most occasions Indian weddings have extremely warm incandescent lights illuminating the stage and can be a spanner in your lighting plans. Also, ensure you carry enough portable lights. Studio lights are a logistical nightmare with a big crowd. It’s a lot easier to shoot with a handful of portable light on a wireless trigger.
8. Go for the shot!
Indian weddings are like a BIG carnival, hence don’t hesitate to move around and get the right frame. Be polite but firm with the hordes of invitees who obstruct your frame with the zillion mobile phone cameras. I volunteer to take the picture with their camera, this makes me look good and I get my frame! Indian weddings are extremely colourful and it is OK to saturate your frame with colours!
Some Important Events/Ceremonies in a Hindu Wedding:
Pre-Wedding
Mehndi: The process of getting ready for the wedding starts with painting the Bride’s hands and feet with an intricate artwork of henna.
Sangeet: An evening of music and entertainment for the close circle of family and friends. It can vary from a traditional night out to a wild party.
Wedding
Barat: The groom is decked up in finery and brought in a procession to the heavily decorated wedding venue. This procession could be on a horse, elephant or in a trusted four wheeler. The groom’s family would be accompanying the procession and in most ‘barats’ you can expect folks dancing to a live band along with the procession on the move.
VarMala: The Bride and groom exchange colourful garlands of flowers on a small but decorated stage called “Mandap”.
Pheras: The Bride and Groom exchange vows in front of the holy fire and go around the fire holding hands seven times.
Mangal-Sutra: The Groom ties a Golden Locket/Thread around the Bride’s neck as a mark of them getting married. The Mangal Sutra is the Indian equivalent of a ring in most cases.
Kanya Daan: A ceremony where the Bride’s family formally hands over their daughter to the Groom’s family. It’s a symbolic ceremony which involves the first family.
Bidaai: A symbolic ritual these days where the Bride leaves her parents and joins her husband in the journey to his house. An emotional event; where the Bride and her family usually break down into tears.
Most Indian wedding proceedings do not pause for photographs. So plan well and have fun!

Wedding photography is the one of the most difficult and interesting to do. Amateurs face it as a challenge to do something creative at wedding where the professional is hired for getting the essential moments photos. Wedding photography has crept into the society to capture the precious moments of life which comes once. All the photographers are competent users of state of all the art equipment. At wedding ceremony, both of the people suffer, one is the hosts and other is photographers. Wedding photographers work with those models whom they have not met before for this purpose. In other words, the people at wedding do not know how to pose. People wear clothes which photographers do not pick. Photographers have to work with those incredulous models without hesitation. Now you will be thinking about how to pose or take photos at ‘wedding photography’. So, here are some of the suggestions or instructions to follow to make your precious moments more precious.
You should select the style of photography which suits you to capture the moments of your wedding. You just need to tell it to your photographer what you like, after that he can do everything. As the change has come in every field, in the same way, the field of photography has also taken a turn from old traditional style to new evolutional style. Traditional photography sounds to be taken a rear seat as a variety of exciting modern styles are becoming popular. Some few old style photographers include the family group photos, signing the register and cutting the cake, all the usual things which have been seen in the last few years. All the photographers are not same. Some of them have the artistry and eye to create images that are dynamic similar to those photos which you have seen in magazines with an interesting composition.
Reportage photography has been working for the last few years very successfully. This photography includes composing or posing only very important and real events rather than capturing everything in camera. All the emotions, laughter and tears should be captured. You can also have a mixture of styles in ‘wedding photography’. So, these are some of the suggestions which you should follow before hiring a professional photographer for your wedding. A photographer should be competent; you should make sure about his photography by asking different peoples before hiring. It is a good to capture a few loving and precious moments rather than capturing every moment of wedding.
A camera, lens, and flash are the basic tools of the trade for a photographer. Just like a painter has a set of brushes and sculptor a set of chisels, a photographer needs to have the basic equipment to capture the scene. When we think of history’s great artists, the one thing they all had in common was they knew how to use the tools of their trade.
USE THE BEST
There are types of photography where using the best gear is not necessary; wedding photography is not one of them. Use the top-of-the-line Canon cameras, lenses and flashes. Many professional photographers use comparable equipment from Nikon. Regardless of the manufacturer you prefer, invest in the best camera body and lenses you can afford—ideally, the top-of-the-line.
It is important to use the best camera body and the best lenses available for a variety of reasons. Let’s start with the least obvious. When you pick up a great top-of-the-line professional camera and lens, you just feel better about everything. It’s like when you put on a great suit or great pair of shoes. It gives you a feeling of confidence, makes you look more professional and gives you more credibility.
Using the best also means your gear is built to withstand heavy use and, at times, abuse. Weddings can be fast-paced, requiring you to quickly change locations and move gear. Often, there are large numbers of guests to work around and equipment can easily get bumped. Since high-end camera gear is designed for professionals, the manufacturers strive to produce durable tools that can withstand the rigors of the job.
Top-of-the-line equipment will also result in higher quality images. Camera manufacturers know their best advertising comes from people seeing what images the professionals produce using their equipment. The newest top-of-the-line cameras usually have more features, better controls and improved image processing. For example, the new direction is for camera manufacturers to increase the ability to shoot great photos in low light, which really helps wedding photographers who regularly deal with low light situations. In essence, there is also a lot of truth to the saying “you get what you pay for.”
This certainly holds true when it comes to camera equipment.
THE CAMERA
One of the main features to look for when selecting a camera is reliability. At weddings, there are no second chances, so it is important to make sure you have good working gear. The bride and groom will not be very happy if you asked them to stop and “re-do” their first kiss as husband and wife because your equipment malfunctioned and you missed the moment.
Having good working gear is a must. Keep a second camera body in your camera bag and a backup third camera body in your car or somewhere close. That way you are covered if something goes wrong, twice over.
Camera Feature Checklist:
* Rugged construction
* High ISO quality
* High resolution
* Strong image quality
* AutoFocus capability
* Frames per seconds
* Vertical grip
* Extra battery pack
* Full frame vs. Cropped Sensor
THE LENSES
A good lens will last a lifetime, and it really pays to get the best “glass” possible. You may use the L series lenses from Canon. The L stands for luxury, and these lenses are truly built with the professional in mind. Even though they cost more than other lenses, they’ll let you create the best images possible.
Nikon has the same lenses, but they do not have an easy way of identifying them. When it comes to Nikon, look for the following:
* AF-S means the lens has a silent wave autofocus motor built-in
* DX means the lens is designed for a cropped sensor only
* IF means the lens has internal focusing and doesn’t change size
* ED is the good glass
* VR is vibration reduction technology
With Nikon lenses, the best bet is to look for lenses that fit your focal length needs and have the widest aperture possible. The easiest way to find these is by price, they are much more expensive than the other lenses. Again, whether you choose Canon, Nikon or another manufacturer, when it comes to SLR cameras, having the best lens is the best investment you can make.
Lens Checklist:
* Maximum aperture for use in low light
* Constant aperture lenses are useful when the maximum aperture doesn’t change and the focal length does because you don’t have to worry about changing the settings when zooming in or out.
* Variable aperture lenses, for use when the maximum aperture changes when the focal length is changed, are usually less expensive than constant aperture lenses. However, they are not as useful, especially in low light.
* Protective filter for the front element of your lens
* Focusing speed for capturing important moments. Lenses with large maximum apertures actually let the camera focus fast as they let in more light.
* Overall quality because the better quality of the lens will mean better image quality
* Rugged construction to withstand the rigors of any location
THE FLASH
Light is the most important part of photography, there are times when you need to add a little to the scene. That’s when the Canon 580EX Speedlites come into play. Carry three of the Canon Speedlites with you, along with the Canon CP-E3 battery packs. The extra power from these battery packs improves the recycle times and increases the number of images you can take before the batteries need to be replaced. The 580EX Speedlites can be used on the camera or they can be used as slave lights on their own light stands and triggered by a master flash located on the camera. This allows you to add the light where it is needed and control how much light is added to the scene.
Use three Speedlites, two for extra fill and one on the camera for a little extra light. The flash on the camera also triggers the two external lights. The problem with Speedlites is what makes them so great for wedding work is also their biggest drawback. Because they are small and portable, they can be moved and used just about anywhere, but this also means they put up a very small hard light. There are a ton of extras that can be used to help turn the hard light from a small flash into a bigger, softer, more pleasing light.
Also use light modifiers to create a more pleasing light without adding much size or weight to the flash. The light modifiers can be used on the two supplementary fl ashes and on the main flash. Since all the flashes are the same, it is easy to switch the modifiers between the fl ashes as needed. To go one step further, put on radio signal transmitting remote triggers on your flashes so they can be controlled wirelessly from your main camera.
MEMORY CARDS
The most important thing about memory cards is to make sure you have enough of them to cover the whole wedding. You’ll never want to take the time during the wedding to do any editing to make space on a memory card. With memory card capacities available from 4GB to 8GB to 16GB and now even 32GB, there is no reason not to have enough cards for every situation. Make sure all of them have been properly formatted and double, triple check that you have downloaded the images from your previous shoots before going to your next job.
CAMERA BAG
A good camera bag lets you keep all your gear close and accessible so you are not searching through the bag at the last minute when you need something important.
Pre -Wedding gear checklist:
* Clean main camera body
* At least one back-up camera body
* Reset all cameras to initial settings
* Check and charge batteries
* Extra batteries
* Clean lenses
* 24-70mm f/2.8
* 70-200mm IS f/2.8
* 16-35mm f/2.8
* 35mm f/1.4
* 50mm f/1.2
* 85mm f/1.2
* 135mm f/2
* 300mm f/2.8
* 15mm fisheye f/2.8
* Macro 50mm f/2.8
* Lens cleaning cloths
* Lens list
* Formatted memory cards (always bring extras)
* Check flash units
* Reset flash units to initial settings
* Check and charge flash batteries
* Light stands
* Light modifiers
* Business cards
* Water bottle and snack bar for extra energy on long days
* One extra dress shirt, in case of stains
SUMMARY
Investing in high quality equipment will give you the reliable tools you need to make great pictures. With a variety of camera bodies, lenses and fl ashes you will be prepared to shoot in any location and can be as creative as you and your clients want. Remember to check and clean equipment before each shoot, and be sure to carry back-ups in case you need them.
Sunday, July 17, 2011
Medical Photography. What is medical photography? What are the essential skill sets, technical skills and soft skills required to be a medical photographer? What are the requisite educational qualifications? What would be the work profile and career prospects? Learn it all in this article on medical photography.

Sunday, July 17, 2011 0
Wildlife Photography Birding. Here is a look at wildlife photography for birding, which is documented bird watching.


Old Fashion Photography Techniques. Classic fashion images evoke glamor and beauty. But, this doesn't have to be a dead art. Learn how to take these types of photographs with your own camera.

Newborn Portrait Photography Tips & Tricks. If the objective of a portrait is to capture personality through expressions, but how do you do that with a newborn? Most parents will tell you that their children have tons of personality right off the bat, and this article will give you tips to help capture it all!


Tips on How to Take Pictures of Cities. One of the most overlooked forms of photography is shooting urban landscapes. If not done the right way, the results can be boring at best or gawking at worst! Learn how to take pictures of cities the right way to produce fantastic and awe-inspiring images.


Friday, July 15, 2011
Have you been looking at HDR photos recently and wondering to yourself, "How do they do it?" If you have a digital camera, you can produce the same types of pictures! This article will guide you through HDR photography and how to get the shots you need to make a stunning HDR photograph.
Friday, July 15, 2011 0
This tutorial guides you through using Photomatix Pro 3.1 to merge photos taken at different exposures into one HDR (High Dynamic Range) image. Utilizing the powerful tone mapping features in this software provides a unique control over your HDR images.


Black and white pictures with color are a great way to emphasize a part of the picture. They can be used to show an artistic approach or can even be used for advertisement purposes. Read this article to learn some of the techniques used in composing and editing these pictures.


If you've ever seen the underwater world, you know it can be beautiful. Now you can take pictures that capture that beauty, with three easy rules.


Look all around you and you'll see images of food in many different forms, from raw to cooked. Taking succulent-looking food images is an art, a science and a profitable branch of digital photography that continues to grow. Here's how you can take better, more delicious-looking images.


