Showing posts with label Photography Tutorials. Show all posts

Friday, July 15, 2011

How to Create an HDR Photo Using Photomatix Pro 3.1

This tutorial guides you through using Photomatix Pro 3.1 to merge photos taken at different exposures into one HDR (High Dynamic Range) image. Utilizing the powerful tone mapping features in this software provides a unique control over your HDR images.


Preparing to Merge


HDR (High Dynamic Range) photography has become a popular technique over the past ten years and is being used more and more. This process involves taking three photos of the same image at different, bracketed exposures in order to capture both the highlights and shadows of an image. Using post-production, HDR software like Photomatix Pro 3.1 will allow anyone with a digital camera to create these brilliant photos.
After launching the software, you’ll click on the Generate HDR Image button on the pane to the left. Then, you’ll need to select the source images that you’ll be merging into one HDR photo. You can browse for these images, but I find it easier just to drag and drop the three photos from Finder into the box (If you’re using a Mac). Click OK. The photos above are the ones that we will be merging. As you can see, one is properly exposed, one is overexposed, and the other is underexposed.
When the Options window appears, Align Source Images is already checked by default, correcting horizontal and vertical shifts. Usually it makes sense to leave these at the default. If I have an image that has very distinct shapes and features, I will change it to align the source images by matching features.
If you’ve taken a photo where there was some movement in the image, HDR can be tricky because the object will take on a “ghost” effect. Ghosting artifacts occurs most commonly with people, animals, nature (trees, clouds, water), and other objects that can blow in the wind or move. Luckily, Photomatix Pro offers a feature in their Options page to Attempt to Reduce Ghosting Artifacts which can significantly help stabilize those images and reduce that effect.

Three Images

(untitled)

Options


(untitled)

Tone Mapping


Provided that the white balance is the way that you want it, click OK to apply those options. On my 2.16 Ghz iMac, it took only about 10-12 seconds to merge these three RAW files (taken with an 8MP camera). Photomatix is extremely quick with it’s processing, which puts it at a large advantage over other programs.
Where Photomatix Pro 3 really begins to shine (like its previous versions) is when it comes to tone mapping. The tone mapping features allow the user to really customize the HDR image in order to recreate the correct tones that match the original lighting of the situation or give a surreal effect.
In this image, I chose to lower the strength and color saturation a bit. I also made sure that light smoothing was set to high. Spend some time tweaking these images. If you mess something up, there is an undo/redo button at the bottom of the tone mapping palette.
When you have the image the way you want it, click Process. Photomatix took only 7 seconds to process the tone mapping changes that I made.

Working in Photomatix


(untitled)

Finishing Up


With the final image, I would generally open it in Photoshop to remove a few specs from the photo. Some of the specs in this photo are not symptoms of the HDR process, but instead a result of dust on the actual lens of my camera. This photo was taken in Hawaii while I was on my honeymoon. Somehow, I forget to clean my lens that day!
Photomatix Pro 3 only has a few basic editing tools, and they are not the easiest to use. Even the simplest of tasks, such as cropping, is more complicated than necessary, having to use the CTRL key while you’re dragging. So, I leave any editing that I need to do for Photoshop CS4 or Aperture 2.1.
When you have the photo the way that you want it, be sure to save it by clicking File and Save As and saving it as either a JPEG or a 16 bit TIFF. Usually, I will save it as a JPEG if I’m using it on the computer (4.7MB), and I’ll use TIFF if I’m going to be printing the image (45.9MB). You can see that there is an enormous difference in size between the two file types. When you are saving the photo, there is a checkbox below the format that you can click to launch Photoshop and save the image in that program. Doing this can increase the compatibility of the file.
Below is the final product of our merged photos.

Finished HDR Image


(untitled)

Practice


With HDR photography, do not get discouraged if your first few attempts don't work out the way that you want them to. This is not the easiest photography technique to master. It does take some practice. So, don't give up and remember: Practice makes perfect!

Friday, July 15, 2011 by WoNG jOwO · 0

Black and White Portrait Photography

Black and white photography is gaining popularity in the portrait market. Learn some photography techniques for creating black and white fine art portraits.


Black and White Fine Art Photography


Black and white photography can create more drama and interest in a portrait. In black and white photography, the character and lines on a face are more thought provoking than just signs of a person's age. The science behind color is vast and it will not be discussed here, but color is more emotional than black and white. Black and white imagery causes our minds to fill in the gaps and interpret the subject. Therefore, it is more character defining than color is in portraits. Look at Figures 1 and 2 below, these two images are the same image except one is black and white and the other color. The girl looks like a young teenager you would see in most American towns in the color photograph. In the black and white photograph, she looks more thoughtful, intense and the attention is on her eyes and expression more than the color of her eye shadow.
The world in black and white is more abstract. When looking at the subject and surroundings, focus on the geometric elements between the subject and with the subject. These are great elements in an image or portrait.

Figures 1 and 2


Color PhotographBlack and White Photograph

Tips for Shooting Black and White Portraits


Lighting the Set


For black and white portraits, the lighting needs to be used differently to create a dramatic mood to the portrait. The mid tones will give that soft ethereal feel, the blacks more drama and the whites that glowing softness on the edges. Each portrait will use light differently. The important thing in black and white portrait photography is to evaluate the subject and decide what type of lighting will best describe their personality. For instance, with babies, soft white light will accentuate the softness of the babies' skin and newness of life. Babies are soft, therefore the light should be soft. With wizened old men, more drama and contrast to show the lines of knowledge that cross their brows from years of learning.

Using Highlights


By using highlights, skin can be softened and smoothed. With the key light, use a higher setting to blow out some of the brighter sections of skin on the forehead, cheeks and chin. This will soften the areas and give a glowing look. (Note: This does not work well in color) In the studio, you can set all the highlight points. If shooting outside, look for light falling though trees as a highlight spot. Position the subject so the light falls directly on specific points on the face or cheek. (See figures 3 & 4)

Find Sharp Contrasting Light


In the studio, light can be moved to create contrast and shadow depth. When shooting outdoors, look for contrasting light in shadowy areas with bits of sunshine seeping through the shadows. This will give the effect of spots. Use direct sun to sidelight or for profile shots. Separating the whites and blacks with a little mid-tone gray is great for creating intensity and drama.(Figures 5 & 8)

Soft Light


For subjects that need a softer effect or dream like quality, use soft boxes for all lighting. By using light in the mid-tone range, this will cut down on contrast and shadow detail. Using soft boxes and reflectors to cut down on contrast can soften the face and reduce the appearance of lines. Combine the use of highlighting and using soft light to reduce shadow detail and the images can be amazing. This softens the appearance, but with just enough contrast to define the face. (Figures 6 & 7)

Figure 3Figure 4Figure 5Figure 6Figure 7Figure 8

Clothing and Make Up


For contrast or highlights, clothing will be important in the overall look. Stay away from white clothing. When looking for drama with lots of black area, browns and black shirts are great. Medium gray, blues, purples and rich greens are great for mid tone color that separates the skin from the clothing. These colors are also good for soft portraits. For more drama black, midnight blues, browns and reds work best. For light colors and highlights light blues and any pastels will work. You can always work with the clothing tones in the imaging process also. Texture is always a great thing to add to any portrait so look for clothing with texture or weaves. Make up needs to be suited to the image. Dark lipsticks will turn the lips an unnatural shade in black and white portraits. Gloss or flat lipsticks will give different effects. For women, mascara, eye shadow and blush are important to create texture and tone on the skin.

Camera Settings


Last but not least, the photographer will need to decide whether to shoot in black and white and avoid the conversion process or to shoot in color. If shooting in color, setting the camera to RAW mode is best. This will record all the information without losing the detail in the highlights. Just a note, in digital when the camera is set to shoot in black and white, the camera will throw away some data.

Summary


Light is the photographer's paintbrush. Use these lighting techniques for beautiful black and white portraits.
  • With black and white portraits just remember to suit the light to the subject.
  • Use highlights to soften and define skin texture.
  • Create richness by using contrast and enhancing the black tones
  • Use contrast by sharp lighting and strong shadows to create drama and interest.
  • Use soft lighting and mid-tone grays for a soft feel to your portrait
Black and white portraits make beautiful art prints. Consider the quality and texture of the paper that they are printed on. Fine art papers are the best suited for black and white portraits.

by WoNG jOwO · 0

Using Windows 7 to Edit Your Images

Windows 7 comes with a free photo editing program: Windows Media Center. This program allows you to perform simple edits to your images, including cropping and contrast correction. Learn how to use this program in this Windows 7 tutorial.


Windows 7 Capabilities


Windows 7 is the latest offering from Microsoft. It comes with the Windows Media Center, which is a program that allows you to perform simple edits to your photographs. You can do edits like red eye correction, adjusting contrast and cropping your images.
Now that you know what you can do with this program, you probably want to know how to edit photos in Windows 7. It’s a fairly easy process. Simply open up the Windows Media Center and your image, and then use the following steps to perform edits to your images.

Red Eye and Cropping


The most common fix to any image is removing red eye from images. Red eye is caused when your flash or surrounding ambient light causes a red reflection in your subject’s eye. To correct this problem using the Windows 7 Windows Media Center, follow the below steps:
  1. Go to the Start screen, and then go to Pictures + Videos.
  2. Open up the Picture Library.Windows Media Center
  3. Right-click on the picture that you need to change.
  4. In the dropdown menu, select Picture Details.
  5. Go to Touch Up and then Red Eye.
  6. Select Save, and Windows Media Center will correct the red eye problem in the image.
Another issue that many people have with images is that the picture is the wrong angle. While you can crop out the edges of the image so that it sits straight, you also lose the rest of the image. It works better to actually rotate the image to straighten it.
You can do this in the Windows Media Center. Navigate to the image, and right-click on it. Go to Picture Details, and select Rotate.
The image rotates at 90 degree angles. You can only rotate the image 90 degrees at a time and not in incremental degrees. If your image is completely upside down, you may have to click the button more than once until it’s in the correct position.
If you over-rotate the image, simply keep hitting the rotate button until it is back in the correct position.
If you do need to crop an image, go to the Touch Up menu, and select Crop. With this tool, you can change the size, orientation and location of the image. When you are done, simply hit Save to save all of your changes.

Fixing Contrast


Many images have problems with contrast. Either the image is too bright, or it is too dark. You can do simple contrast correction with Windows Media Center. Open up the Picture Details menu, and click on Touch Up. Select Contrast, and then press Save to save your changes.
The program will then apply a simple contrast correction to the image. If your image still doesn’t look right, you can either undo the change, or save the current change under a different name. If the contrast correction makes the image look worse, then you really want to use another program.

Editing on the Slideshow and Printing


Media LibraryWindows 7 Windows Media Center allows you to edit your images while you are watching them on a slideshow. To do this, follow the below steps:
  1. Go to the Start screen, and select Pictures + Video.
  2. Open up the Picture Library.
  3. Find the picture that you want to edit, and click on it. It should now fill up the screen.
  4. Right-click on the image, and select the Picture Details option.
  5. Make the changes that you need to make to the image.
  6. Select Play Slide Show to start the slideshow again.
Once you are done with all of your edits, you may want to print the image so you can share it with others. To print an image in Windows 7, follow the below steps:
  1. Right-click on the image to bring up the Picture Details menu.
  2. In this menu, select Print to bring up the print picture dialog menu.
  3. Select your printer and printer options.
  4. Press Print to start printing your picture.
You can also use this program to delete unwanted images from your computer. To delete an image, go into the Picture Library, and right-click on the image that you want to delete. Select Delete, and press Yes, confirming that you actually want to delete this image.
Now, you know how to edit photos in Windows 7. The Windows Media Center only allows you to perform simple edits. If you need advanced edits, you can use other free programs like GIMP or online editors like Photobucket and Picnik. While the Windows Media Center isn’t a full editor, it’s great for quick edits on your Windows 7 PC.

by WoNG jOwO · 0

How to Enhance Contrast by Adjusting Levels Using Adobe Photoshop

This article explains how to improve contrast in an image by using the Levels tool in Adobe Photoshop.


Levels Tool


Related article: Understanding Histograms

Levels is a simple post processing tool available in most photo editing software, used to improve contrast in an image. A dull picture can be transformed into a colorful image in no time by making minor adjustments with Levels tool. In photoshop, you can open Levels tool from the menu Image >> Adjustments >> Levels or by the shortcut key Ctrl+L. In Gimp, Levels tool can be found at Colors >> Levels.
First, let's open the target image in Photoshop. For this exercise, I am using this picture of a lake surface shown below.

original image

Next, open the Levels tool. As shown below, the Levels tool displays the histogram for the image, with three sliders at the bottom. Let's look at each of these sliders and adjust them.

Adjusting the Black Point


Of the three sliders below the histogram, the one to the left determines the black point of the image(brightness value zero). If the slider is moved to the right, the new location of the slider becomes the new black point. All the pixels that fall to the left of the slider will be made completely black. The histogram will be re-adjusted for the new position of the black point, effectively reducing the brightness of the whole image.
In the above histogram, move the black point to the right until the point where the graph starts rising. Preview the change in the image and see that it gets darker.

Adjusting the White Point


The slider to the right determines the white point of the image. When the slider is moved to the left, all the pixels to the right of the slider will be made completely white(brightness level 255), and the histogram will be re-adjusted for the new white point. The resulting image will be brighter than before.
Move the slider to the left close to the point where the graph starts rising, as shown in the picture below. See that the image gets brighter.

white point

Adjusting the mid-tones


The position of the slider in the middle determines the mid-tones, also called the Gamma. Adjust the slider to the left or right until you get a pleasing tone. Moving the slider to the right decreases brightness, and moving to the left increases brightness. Note that the black point and white point remain constant while the mid-tones get adjusted.
In this picture, I have moved the slider to the right.
gamma
This concludes adjusting the levels. Below is the final image after adjusting all three sliders. Compare this with the original image and see the evident change in contrast.

final

Conclusion

The Levels tool enhances the contrast of an image by expanding the tonal range of the image.
For most images, it is recommended to adjust Black Point and White Point until the point where the graph starts rising. However, this is more of a guideline than a rule. Use the preview and play with the sliders to get best results for each image.
If you move the black point to an extent that some pixels fall to the left of the black point, all these pixels will be made pure black(brightness zero). Similarly, when you move the white point, any pixels to the right of the white point will be made pure white. The color information in these pixels will be lost. To ensure that no color information is lost, hold the Alt key when you move the black slider or white slider. Any colors that get clipped will start appearing on the screen.

by WoNG jOwO · 0

Understanding Histograms

This article helps photographers understand how a histogram can be interpreted and used when taking pictures.


Introduction


A histogram is an important tool used to get accurate feedback on how well an image is exposed.
In the days of film, professional photographers spent a lot of time understanding how their camera's metering system behaved and how they should expose the images when taking pictures. There was no instant feedback system, and there was plenty of room for exposure errors. Digital photography changed all that, making it possible to instantly review the image and take another shot if any corrections are required.
While playback on the LCD gives a fair idea of how an image is exposed, histogram provides a more accurate feedback, helping the photographers to take properly exposed pictures
.

What is a Histogram?


Each digital image is made up of millions of pixels, and each of these pixels has a brightness level associated with it. In most cameras, there are 256 brightness levels, with zero representing a completely dark pixel, and 255 representing a completely bright one. A histogram is a graph representing the distribution of brightness of pixels in an image. The graph is plotted as number of pixels against each brightness level.

How to see and interpret histograms?


Most high-end point-and-shoot cameras and almost all digital SLR cameras are equipped to display the histogram on their LCD screen. Refer to your digital camera's manual to find out how to view the histogram of an image. Advanced image processing software, like Photoshop and Gimp, can also be used to see the histograms once you load the image onto a computer.
For a dark or under-exposed image, the histogram is usually taller at the left side of the graph. A histogram of a bright image is taller on the right side. The images below demonstrate interpretation of a histogram. Here, a sample subject is shot three times, each time with a different exposure. Along with each image is the histogram corresponding to it.

under exposed image

The above image was under-exposed. As you can see, the graph is taller on the left, which indicates that most of the pixels are on the darker side.

correctly exposed image

This image was properly exposed. You can see more pixels towards the center of the graph. The image seen below was over-exposed, which has more pixels concentrated to the right side of the graph.

over exposed image

This way, a graphical representation of brightness helps to understand if the image is exposed properly.

How to use it when taking pictures?


When taking photos, the most important use of a histogram is to check the exposure. Verifying the histogram after taking a picture helps to decide if exposure correction is necessary, and by how much.
Note that a histogram with a lot of bright or dark pixels may not always mean that there is an exposure error. It also depends on the subject you are shooting. For example, if you are shooting in a place where there is a lot of snow, it is natural that most of pixels are bright. Similarly, it is normal to have many dark pixels if you are shooting stars in the night sky.
Another important use of histograms is to check if an image has burnt pixels. The presence of brightest pixels (brightness level 255) in an image often means that some part of the image is blown out to pure white because of over-exposure. Details of such sections of the image are permanently lost and cannot be recovered. Most cameras indicate such burnt parts of the image by blinking those sections on the display. If you see any blinking parts in an image, it normally means that the image is over-exposed, and it is time to adjust the exposure.

by WoNG jOwO · 0

How to Fix a Creased Photograph

Here are some photo restoration tips and tricks that will teach you how to fix a creased photograph.


Creased Photos


One of the more common problems you'll run across when restoring old photos is the inevitable creased photograph where the paper has split open and you have a nice line running through the image. Sometimes the crease is down in a corner and it's not so noticeable, but other times the crease can be right in the middle of the photo, like it was folded in half years ago and stuck inside a book. While the techniques for how to fix a creased photograph are not perfect, there are tricks you can use to restore the image enough that most people can't tell the difference. In this article, we'll go over the basics of how to fix a creased photo.

Before & After


Restored Photo SampleIn the sample photo here, you see what the original photo looked like before and how it appeared after I removed the creases. I zoomed in a little on one corner to show detail so we could focus on one area for the purposes of this article. Since this is a basic tutorial, I want to stick to basic patterns and colors. Once you get the hang of that, you can move on to more complex restoration like rebuilding textures, people's faces, and so on.
The general idea here is to find the 'good spots' in a damaged photo and make copies of those sections, then paste them over the 'bad spots' in order to cover up blemishes like creases and tears. It's a painstaking process that can't be done all at once unless the photo has one minor issue. In the next section, we'll go over all the steps required to take the original photo and clean it up.

Photo Restoration


Note: These instructions are for Adobe Photoshop or Photoshop Elements, but the basics still apply depending on what other photo editing software programs you use, so long as they allow you to select portions of an image and paste layers.
Since this photo has a lighter color border, we will start by cleaning up that outer border. This will need to be done for both the top and the sides.
  • Select a small portion of the border that is clean, then copy it and paste as a new layer.
  • Drag that new layer over part of the border that you want to fix. Keep pasting new layers until you get it all covered.
  • Repeat the same process for the left side.
  • Use both top and side pieces to rebuild the corner, then take a sliver of the light color area to fill in the upper right corner.
Now that the borders are cleaned up, it's time to fix the middle section of the photo. Since this is and older image, it has a nice brownish texture that is easier to copy. Color photos are much more difficult to clean up, but the same principle applies.
  • Use the Lasso tool to select the cleanest chunk of the middle section, then copy and paste it as a new layer.
  • Drag that new layer over the creased area, and keep doing so until it is covered.
  • Once you got the crease covered, keep filling in the space until everything is clean.
Once you have all the 'bad spots' covered, you may see some hard lines around the borders of the smaller layers you pasted. If so, use the Smudge tool in Adobe Photoshop to smooth them over, and you're done.

Screenshots

Getting started.Fixing borders.Borders.Covering up.Ready to be smudged.

by WoNG jOwO · 0

Creating Words from Objects

You can take photographs of normal objects and then string these objects together to create words. Alphabet pictures are fun and fairly easy to do. All you need is a good imagination and a willingness to look at objects in out of the norm ways.


Easy as ABC


Alphabet photography involves taking photographs of existing or created objects to create a word. For example, you could create the word Paris using the Eiffel Tower as your letter A.
This type of photography is very creative and fun to do. It doesn’t matter what you use to create your letters, but the more creative you get, the more interesting the shot is. While you can simply put together a series of alphabet blocks to create your shot, you may have more fun finding a curved blade of glass that looks like a C.

Easy A


Of course, there are easier ways to getting alphabet pictures than simply taking them yourself. The lazy way to create alphabet photography is to use stock photography. Sites like Alphabet Photography Inc. allow you to input a word into their search box, and then hit Create a Word. The website will search its database of over 1,000 alphabet pictures. It then puts together a series of letter art to create your selected word.

Be Adventurous


Letter CIf you are more adventurous, then grab your camera, and go for a stroll. You can see letters in nearly anything. The goal is to find real objects that really look like a letter. A popular example is to use the center frame and a section of a stained glass window to create an A. Other photographers use the foam of the sea.
As the tides rush ashore, the foam gets caught on the beach, producing different shapes. Oftentimes, these shapes look exactly like letters. If that doesn’t work, then find shells, which also come in different shapes and sizes.
Don’t just look at items straight on. Turn your camera on its side or upside down, and take the shot. Really examine the world around you. While it may not look like a B from one angle, an entranceway may make the letter if your camera is turned to the side. The whole point of this photography is to get creative so be sure to have a lot of fun while you are working.

Alphabet Soup


If you want a real challenge, take your can of alphabet soup, and gather up the letters that you want to string together to make your word. You, however, also want to keep the other letters in the shot, preferably near the fringes. This means that you can’t shake the table a lot while youLetter A are taking your shot.
A white bowl works great against the tomato color of the soup. Also, have a neutral background for the bowl, maybe black or a checkered red and white tablecloth to create a homey feel. Take your shots as quickly as possible as the alphabets in the soup are going to quickly want to move on.

Finishing Touches


Once you are done taking and manipulating your shots, you can put them together to create a collage-like look. You can use a software program to cut around the different items and string them together within a single canvas.
A more interesting look, however, is to keep the images on their respective canvases. Then use a larger canvas and arrange the images on this canvas so that they make the word. You don’t, however, have to keep them in a straight line. Curve the images, or make a jagged or zigzag line out of the images. The more creative that you can get the better the image is going to look. Just remember that your audience still has to be able to read the word so don’t get so creative that the meaning is lost to others.
If the images are quite different, consider changing your images into black and white. Where a landscape image might clash with a cityscape in color, they’ll look perfectly natural together if you convert the images into monochrome. You can also add a filter to the entire canvas to ensure that the images flow into one another.
Look at the edges of the image, and consider feathering extremely harsh images. This will ensure that the photographs easily blend together. Think about your background. Will your images look better with just a plain background, or could you add another photograph with scenery or people to enhance the overall effect?
Alphabet photography is fun and very rewarding. You’ll start seeing letters in everything after a little while, so always have your camera with you. Many photographers have converted this type of photography into lucrative businesses, especially at street fairs or events. Event-goers often like picking up souvenirs with their names on them. This type of photography offers you a great opportunity to turn your passion into a full-time business.

by WoNG jOwO · 0

Wedding and Event Photography

Wedding and event photography is a lucrative business for photographers. But, you must know how to correctly take these photographs. Learn more in this digital photography tutorial.


Wedding and Event Photography Overview


While most people think of weddings as something different or more complicated, it’s actually an event just like any other event. Yes, the meaning of it is special, and you certainly want to capture all the priceless moments that come with the ceremony. But, you can apply standard event photography to weddings and wedding photography techniques to regular events. Wedding and event photography go hand-in-hand, and you need to know certain tips before venture into this field.

Find Out What the Client Wants


WeddingWhen you are hired for any type of event, always talk to your client. Learn what they want you to capture and how they want you to capture it (style). While event photographs often look like they are just capturing random things, usually the client wants specific items photographed. For a wedding, that would include the bride walking down the aisle, the exchange of rings, etc. For a regular event, that may be the speakers, certain booths or attendees.
Once you figure out what your client wants, come up with a list of must-have photographs. You’ll be taking a lot more than these. But, it’s good to tick off the ones that your client is definitely expecting.

Preparation and Establishing Shots


Scope out the area the day before or hours before if you can’t get into the venue earlier than that. Review the schedule of events, and be sure that you know when the event begins and what’s going on at different times. Figure if you need a car to get between locations or if you can walk there. This will affect the type of equipment that you use. If you are walking, you probably want to go light.
Always take a few shots that show what the event is about. For example, at a wedding, take a few pictures of the church or the scenic area if it’s an outside wedding. For a regular event, this could include booths, stages, banners etc. The goal of these photos is just to let your audience know what’s going on.

Equipment and Settings


Bring everything that you need with you. You don’t have time to run back to the car or, worse, your studio. Have extra memory cards, batteries, filters, tripod, lenses and lighting. Have your camera set to the correct settings beforehand. For inside images, you may have to increase the ISO. For action shots, use a faster shutter speed.

Take Quality Shots


The day of the event is going to be hectic. But, you still must take good photographs. Frame out events. Capturing the bride and groom dancing, and use a door as a frame. Zoom in on people’s faces to show their excitement. Get the little things, which may not seem important at the time. But, these are sometimes the best picture. The boy playing in the corner may be the most memorable shot.
Don’t stick to staged shots. They’re boring after a while. Find people talking, dancing, asking questions, etc. Candid shots show more of the story than posed photographs. Shoot from the hip so people don’t know that you are photographing them.

Post Production


Once you are done, go through your photographs, and clean them up a bit in an editing program. You may also consider adding feather filters or similar effects to photographs of special moments.
Don’t throw away photos that you consider bad. Leave the client see them. What you consider junk, they may consider a perfect photograph.

by WoNG jOwO · 0

Tuesday, July 12, 2011

Photography Tips for Point and Shoot Digital Cameras

Photography Tips for Point and Shoot Digital Cameras. Simple tips and techniques for taking pictures with a point-and-shoot digital camera. ... Camera reviews, digital camera reviews, and photography communityPhotography Tips For Point And Shoot Digital Cameras - point shoot tips portraits sports action point and shoot digital cameras. If you are using a digital point and shoot camera you may have something called ... Illustration Images for Point and Shoot Camera Tips. Photography. Photography Tips for Beginners With Point and Shoot Camera. in Photography,Tips and Tricks. So you just bought your first digital camera. 

Macro-Compact-Camera

Much has been written on the topic of Macro photography for those photographers fortunate enough to own a DSLR with macro lenses – but what about if you own a compact point and shoot camera? Can you get great macro shots too?
While the results achievable with a point and shoot camera in macro mode probably won’t compare with a DSLR with a purpose built macro lens I’ve still seen some remarkably good shots with compact cameras (all three shots in this post were taken with compact cameras). Here are a few tips to help you get the most out of yours:


Select Macro Mode 


this is a fairly obvious first step but I’m always surprised by how many digital camera owners haven’t explored the shooting modes that their camera has. Macro mode is generally symbolized with a little flower and when selected it will tell your camera that you want to focus on a subject closer to your lens than normal (the minimum distance allowed will vary from camera to camera – consult your instruction manual to find yours). Macro mode will also usually tell your camera to choose a large aperture so that your subject is in focus but the background is not.

Use a Tripod 

in macro photography a tripod can be particularly useful, even if you’re just shooting with a compact camera. Keeping your camera still not only improves your shots (getting rid of camera shake) but it allows you to play around with different settings without losing your composition.

Aperture 

once in macro mode some cameras will not allow you to make many other adjustments but if you are able to play with your aperture settings it can be well worthwhile to do so. As we’ve covered in our Aperture tutorials, the main thing that aperture impacts is the depth of field of your shots. Choose a small aperture (big number) if you want a large depth of field with everything in focus or a large aperture if you just want your main subject in focus. In macro photography you’ll probably want a shallow depth of field so select the largest aperture available.

Focusing

I find that in macro photography it is helpful to have full control over focusing – especially when you have shallow depth of fields where it is all the more important to make sure the right part of your shot is in focus. If your camera allows manual focusing select this option and manually focus on the part of our subject that is the main point of interest.

Composition 

remember some of the basic rules of composition like the Rule of Thirds. Make sure your image has a main point of interest and place that focal point in a smart position in your image in order to draw the eye of your viewer. Try to select a non cluttered or simple background for your main subject so as it doesn’t compete with it visually.

 
Macro-Flower
Flash 

in many macro shots having some artificial light is important. The challenge with compact cameras is that most give you limited control of your flash. As a result choosing a good time of day when there is plenty of available light is probably your best bet. If you do need more light check to see if your camera allows you to pull  back the level that your flash fires at. Alternatively you might like to try diffusing it in some way (tissue paper or cellotape over the flash for example). Another option might be to use some other source of artificial light or to invest in a reflector to help make the most of available light. Experiment with different methods of lighting your subject.

Take Your Shot 

once you have your shot lined up and in focus take your shot. Make sure once you’ve taken it to take a good look at it on your LCD, zooming in to make sure that your focusing is sharp. Try shooting at slightly different apertures, with different compositions and focusing on different points of your subject to see what works best.

Macro Lens Attachments 

some compact cameras actually have accessories available to help with macro/close up photography. These will enable you to enlarge your subject and/or decrease your minimum focal length. These might be worth investing in if you intend on doing a lot of macro work.

Self Timer 

(this point was added as a result of comments below – thanks team!) when using my DSLR for Macro work I tend to use a shutter cable release and tripod to make sure my shots are completely still (to eliminate the small amount of camera shake from pressing the shutter). Most compact cameras don’t have cable releases but a simple way around this is to use your camera’s self timer on it’s shortest time setting which will similarly mean you have no movement of your camera when taking your shot (if you’re taking notice of the ‘use a tripod’ tip above).

PS: I’ve used the term ‘macro photography fairly loosely here. Technically ‘macro photography’ is actually when you produce an image where your subject is captured on your image sensor at life size (or bigger) with a 1:1 ratio.
In the case of most (all?) compact cameras this is not achieved and in fact ‘close up’ photography would be a better description. However as most manufacturers call their close up mode ‘macro mode’ I’ve used the term for the purposes of this article.


Tuesday, July 12, 2011 by WoNG jOwO · 0

13 Lessons to Teach Your Child About Digital Photography

13 Lessons to Teach Your Child About Digital Photography. 13 Lessons To Teach Your Child About Digital Photography. Today while sorting through some old boxes I found a photo album filled with the first ever photos. Teach your children how to use the zoom on your digital camera – but don't forget to teach them how using their legs to move closer can. 13 Lessons to Teach Your Child About Digital Photography. There's a great article on teaching kids about digital photgraphy posted at the Digital. Kids Photography Lessons. Part of the fun with hobbies is in learning new techniques to help ... 13 Lessons to Teach Your Child About Digital Photography.

Teach-Children-About-Digital-Photography
Today while sorting through some old boxes I found a photo album filled with the first ever photos that I took as a young budding photographer. I was around nine years old when I first started using our family’s film point and shoot camera and I still remember my Dad’s ‘training’ on how to use it. Basically it consisted of this advice:


‘Don’t take too many shots’
Remember, this was back in the day of film photography where film and processing costs made my Dad’s advice pretty sound. However looking back over my early images I wish he’d taught me a few other things about taking photos. Here’s some of the advice I could have benefited from hearing.
Note – before I start I should say that you can probably teach a child too much about photography and ‘kill’ some of the playfulness that I think makes the images that a child can take special. My main advice would be to instill in your child the first lesson below – of experimenting and having fun:


1. Experiment


Experiment
Looking over many of the shots that I took in those early days shows me that I took a lot of shots of almost exactly the same things. I approached my subjects in much the same way with every shot and as a result ended up with very similar results. Teach your child how to vary their shots in a number of these ways:


  • shoot from different perspectives – up high, down low etc
  • getting in close – stepping back for a wider angle shot
  • moving around your subject to shoot from different sides
  • experimenting with different settings (teaching them about different exposure modes)

2. Check your Backgrounds


BackgroundsA very simple concept that can enhance an image is to check out the background of a shot to check for clutter or distraction.
Teach your children to scan the background (and the foreground) of an image quickly and to change their framing if there’s too many distractions – otherwise their shots will end up like mine used to with all kinds of objects growing out of the heads of those I was photographing.
Read more about How to Get Backgrounds Right

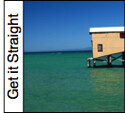
3. Hold the Camera Straight


StraightThe other obvious problem with many of my first images is that they rarely lined up straight. In fact after viewing my first album for a few minutes I began to feel quite dizzy!

While shots that are not straight can be quite effective (they can be playful or give a more ‘candid’ feel to them) it is good to teach your children to check the framing of their shot before hitting the shutter.

4. How to Hold a Camera


Holding-CameraIt is easy to assume that everyone knows how to hold a digital camera – however while many people do it intuitively some will not – particularly children who are unfamiliar with them. In fact I’ve seen a lot of adults who could do with a lesson or two on how to hold a camera and whose images must suffer with camera shake as a result of poor technique.

A quick lesson on securing your camera could help a child get clear, shake free images for years to come.

5. Get in Close


Get-In-CloseAlmost all of the shots that took in my first rolls of film have my subject somewhere off into the distance of the shot. This is partly because the camera that I was using didn’t have a zoom lens – but it was partly because I didn’t understand how getting in close would help capture the detail of a subject.
Teach your children how to use the zoom on your digital camera – but don’t forget to teach them how using their legs to move closer can achieve the same results!


6. Take Lots of Photos


Lots-Of-Shots-1While my Dad’s advice did save our family a lot of money at the time – with the advent of digital photography, taking lots of pictures is no longer something that is too costly (although there are costs in terms of storing them all). Taking lots of images is a great way to learn different techniques of photography.
While you probably will want to encourage your children not to take 100 shots of exactly the same thing – encourage them to experiment with lots of different shots over time and as they do you’ll see their photography improve.

7. Getting the Balance Right Between Photographing People, ‘Things’ and Places


People-PlacesI still remember coming back from my first overseas trip as a teenager (a school trip) and showing my parents my photos. Their first comment was that I had hardly taken any shots of people. All my shots had been of buildings. While some of them were interesting – I missed one of the most important aspects of the trip – those I was traveling with.

I chatted to a friend with two children recently and she told me that one of her children did the same thing with me – but the other came back from a school trip with hundreds of photos of their friends but none of the sites that they saw. I guess some children get too focused on photographing sites and some too focused upon photographing people. If you see your child doing this – perhaps reflect back to them that they think about different types of photography.

8. Find a Point of Interest


Points-Of-InterestInteresting photographs have interesting things in them – they need a visual point of interest (a focal point). Teach your child to identify what this point of interest is before hitting the shutter.
Once they’ve identified the point of interest they can then think about how to highlight it (by positioning themselves, using their zoom etc).


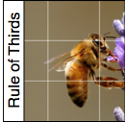
9. Rule of Thirds


Rule-Of-Thirds-1A simple principle of photography that I’ve taught a number of children is the Rule of Thirds. While I’ve talked numerous times about how breaking this rule can also be a powerful effect – it is something that I’ve found really can lift a child’s images – particularly when they are photographing other people.

Even if the child doesn’t completely understand to position their subject right on the intersecting third points – to teach them how to place their subject off centre can be enough.


10. Review Your Children’s Images with Them


Review-Photos-Together-1One thing that you can do to help your children drastically improve their photography is to sit down at the computer with them after they’ve been out with their camera to go through their shots.
As you scroll through them pause to affirm them with what they’ve done well and to point out things that they could do better next time to improve their results. Pay particular attention to the shots that they do well with as this will give them positive reinforcement and inspiration to keep going with their hobby.

11. Focal Lock


Focal-LockOne important technique that children will do well to learn is how to use focal lock. While most cameras do well in auto focusing upon subjects there are times when you’ll end up with shots that are out of focus because the camera doesn’t know what the main subject is (particularly if they are placing subjects off centre with the rule of thirds).
Teach your child how to press the shutter halfway down to focus and then to frame the shot while still holding it down and they’ll have a skill that they’ll use forever!
Learn how to Use Focal Lock

12. Different Modes for Different Situations


Digital-Camera-Modes-2The day that i discovered my family film camera had a little dial for different ’shooting modes’ on it was a day my photography improved a little. Most digital cameras these days have the ability to switch a camera into modes like ‘portrait’, ’sports’, ‘macro’ etc. Teach your child what these modes mean and when to switch to them and you’ll be taking them a step closer to learning about how their camera works and how to learn about manual exposure modes (see the next point).
Just knowing that different situations will mean you need to use different settings is an important lesson for kids to learn as it helps them to become more aware of not only their subject but things like how light, focal distance and subject movement can impact a shot.
Read our tutorial on Different Camera Modes

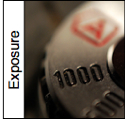
13. Exposure Settings


Exposure-1Once your child has a good grasp on the above techniques it might be time to teach them some basics of exposure (this might be one for slightly older kids). Learning about the three elements of ISO, Aperture and Shutter Speed are a useful place to start your lessons and giving them an introduction to how changing these settings can impact a photo.
The best way for them to learn this is by introducing them to Aperture and Shutter priority modes.

What do You Teach Your Children?

Of course deciding which of the above lessons for kids on photography to teach your child will depend upon their age and experience. Some are obviously more appropriate for some children than others. I’d be interested to hear what readers do when it comes to this topic? What have you taught your kids?
With my own son (who is 16 months old) we’re obviously not up to any of these – however I am teaching him to become familiar with cameras – showing him images once they’ve been taken on the LCD, letting him look through the viewfinder and even pressing the shutter. This familiarization is really nothing more than that – but in doing so he’s becoming more comfortable with cameras – and I’ve noticed when I’m photographing him (which does happen a lot) he’s much more happy to pose for me.

by WoNG jOwO · 0

Wedding Photography Gallery

Wedding Photography Gallery


Wedding Photography Tips
Canon EOS 5D - 20th/sec - F2.8 - ISO 1000 - Aperture Priority - Posed
Same bride and location as the previous image, and a shot that we noticed as we were returning from another shoot elsewhere.
It is ridiculous to think that this shot came out at all let alone be one of my favourites from the day when you look at the exif data...20th/sec, f2.8 and ISO 1000 hand held!
My tripod was in the reception area.
The bride stopped and insisted we took a shot here...and in hindsight, I am so glad she did. It was about 10.30pm, I was absolutely dead on my feet from a long day and we still had the reception to shoot.
As we had just finished another shoot, I hadn't changed the batteries in my flash and they were screaming to be set free. However, I just managed to eek out about 1/1000th of the power left which was just enough to illuminate her dress and face...phew!
This is a time when all the preparation in the world won't help. You just have to think on your feet and hope for the best.
Lens 24-70 2.8 L at 40mm

Wedding Photography Tips
Canon EOS 5D - 1/4sec - F6.3 - ISO 500 - Manual - Natural

Just another experimental shot this.
I used the same technique as in a previous image
where I used a very slow shutter speed coupled with fill in flash to allow the ambient light to be included in the photo.
I quite liked this triptych and included it in their slideshow which the couple liked...not everyone's cup of tea though.
Lens 70-200 2.8 L at 70mm

Wedding Photography Tips
Canon EOS 5D - 200th/sec - F7.1 - ISO 320 - Aperture Priority - Natural
This shot came out of nowhere and became a favourite of mine.
I had been outside waiting for the bride to arrive and when I came back in the hotel, the groom was obviously doing the same.
I don't know if he saw me take this shot or not as I was just walking in when I noticed him peering behind the pillar and simply fired away from a distance.
Lens 24-70 2.8 L at 70mm

Wedding Photography Tips
Canon EOS 5D - 80th/sec - F6.3 - ISO 200 - Manual - Natural/Posed
I guess this shot could be classed as semi-posed. The bridesmaids were blowing bubbles and generally larking about during the canapés and waiting for the meal to begin.
I asked this young lady to spin as she blew the bubbles but we just couldn't get it to work...so I Photoshopped the bubbles in from another image (but don't tell anyone)!
The usual manual settings and bounced flash worked a treat for me. A slower shutter speed lets the colourful ambient lighting in the background show up nicely.
Lens 24-70 2.8 L at 34mm

Wedding Photography Tips
Canon EOS 5D - 160th/sec - F3.2 - ISO 1250 - Aperture Priority - Natural

I was caught a little off guard here. I was in "stealth mode" and shooting the reactions of the couple to the speeches when one of the bridesmaids looked straight at me.
I quickly focussed on her and took a couple of shots. If the room is bright enough I rarely use flash
unless absolutely necessary. The speakers have enough to think about without it being blindingly obvious that they are being recorded!
Lens 70-200 2.8 L at 166mm

Wedding Photography Tips
Canon EOS 5D - 60th/sec - F7.1 - ISO 320 - Manual - Natural
If I take enough images (and I normally do) I like to try and tell a story with them which is particularly useful when making up the albums or books.
The large image normally has the main emphasis and the smaller ones lead into it with a story of some sort.
In this case, the speech went on for quite a while so I incorporated a small picture of the best man looking at his watch.
I think that for all of these shots, I kept the camera on the same, manual setting and used bounced flash as I was firing into the light at this point and would have got silhouettes otherwise.
Lens 24-70 2.8 L at 57mm

Wedding Photography Tips
Canon EOS 5D - 60th/sec - F5.6 - ISO 320 - Manual - Posed
I love this shot purely for the expressions on their faces.
If I remember correctly the bride had just been told something but the groom remained the consummate professional and remained "in character".
It was also used as a montage in my online and
printed portfolio book.
Whatever happens around you, if proceedings get halted for any reason, just keep firing! It doesn't cost you anything and you may end up with some corkers.
Lens 24-70 2.8 L at 32mm

Wedding Photography Tips
Canon EOS 5D - 80th/sec - F6.3 - ISO 320 - Manual - Natural/Posed
You may have seen this image adorning the front page of All Things Photography for a while whilst I wrote this section.
I like the rich colours and full-on activity contrasted with the larger image of one bridesmaid "flaked out" after all that exercise.
Whatever is going on I try to shoot as many images as possible and when children are highly active like this, many shots will be either blurred or poorly composed. If I get a bunch that is decent 
and useable for the album I am more than happy. 
The arm falling out of the frame was an after thought
for the book...
Lens 24-70 2.8 L at 45mm

Wedding Photography Tips
Canon EOS 5D - 125th/sec - F4.5 - ISO 200 - Aperture Priority - Posed

During the "formal" sessions with the bride and groom, it is nice when they decide to take over and have a little fun...don't stop shooting because of this...on the contrary.
I cropped in tight for this one and used natural light with no fill in flash. I didn't want to "disturb" all the natural colours that were going on around the couple.
I may have needed to pull some detail out from the RAW image in Photoshop later on but not too much I think. By the way, did I mention the importance of learning how to shoot RAW for wedding photography yet?
Lens 24-70 2.8 L at 70mm

Wedding Photography Tips
Canon EOS 5D - 60th/sec - F6.3 - ISO 125 - Aperture Priority - Semi-Posed

This wedding was in a much built up area on the Costa del Sol in Spain. After the ceremony, we drove the wedding party to a nearby park for some more relaxed images and a nicer environment.
After we had taken a few, I just asked the couple to stand on the pier and chat for a bit. I then ran round the other side of the lake and started firing away.
This one stood out because the failing sun was falling onto the couple and not the bridal party. When I returned they asked why I didn't take any because I hadn't told them what to do...Pah!
I hope you enjoyed looking at theses images and that they may have given you some useful advice on what to do and what not to do.
One last thing. From the same wedding as the above image, here is the shot used for the top bar on all of these wedding photography tips pages just so you know it is a real image...
Wedding Photography Tips
Lens 70-200 2.8 L at 173mm


by WoNG jOwO · 0

Related Posts Plugin for WordPress, Blogger...